-

-

-

-

-
CopyToClipboard

- Web
- Mobile – Owner-Operator or Dispatcher
- Mobile – Driver
- Tips
A Step-by-Step Guide
Navisphere® Carrier makes it easy for carriers to manage loads and get paid quickly. One of the most effective ways to speed up your payment process is by uploading your documents directly through the platform. Uploading documents in Navisphere Carrier speeds up processing, reduces delays from missing paperwork, and lets you submit from anywhere using your phone or computer. This step-by-step guide will take you through how to upload your documents correctly and efficiently—whether you’re using the web or mobile app.
Web
Step 1: Log In to Navisphere Carrier
Go to www.navispherecarrier.com and login with your credentials.
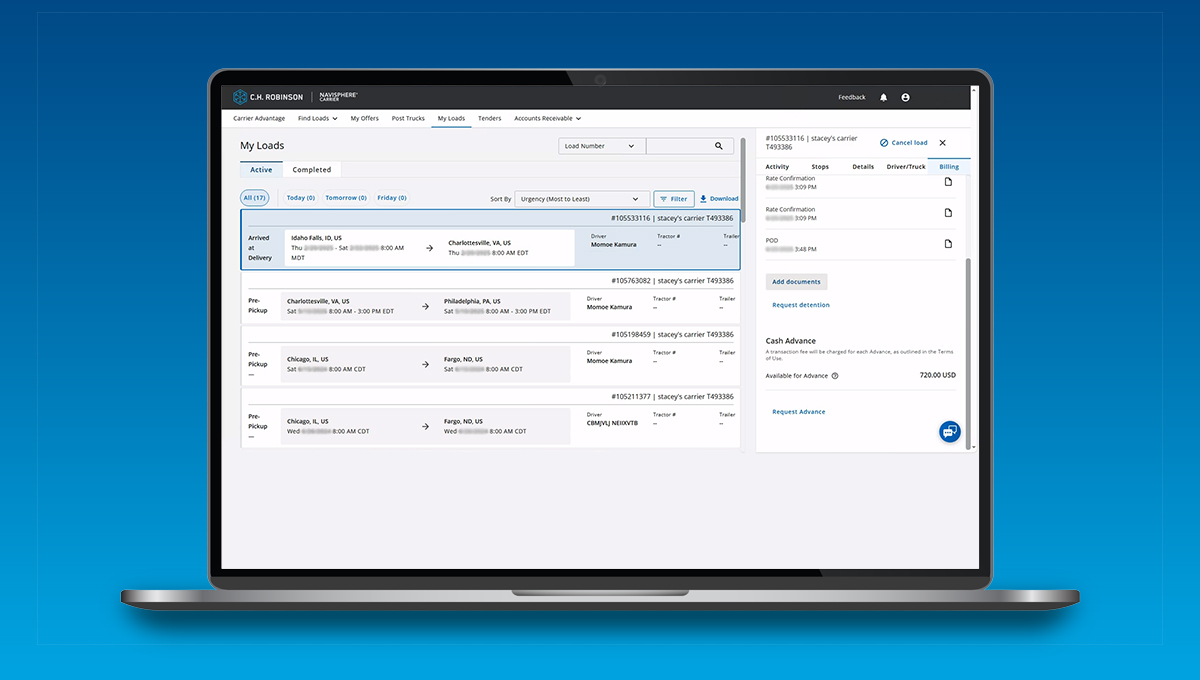
Step 2: Go to your load
Go to the My Loads page and select the load you want to upload documents for.

Step 3: Add documents
Go to the Billing tab in the load details panel, then click the Add documents button.
Step 4: Select documents to upload
Choose the document type. For some document types, you also have the option of adding the document to a stop. Then, click the blue Choose File button.
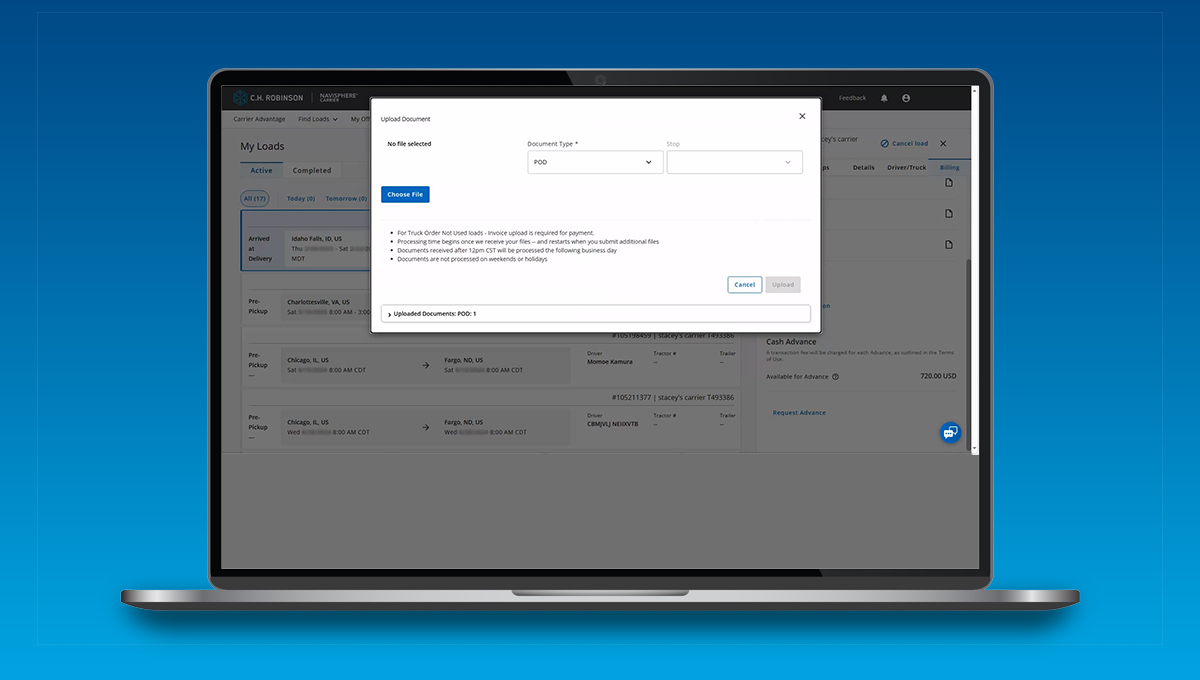
Step 5: Upload document
Once you have selected the document from your device, you’ll see a message prompting you to confirm your upload, as you will not be able to edit it later. Click Upload.

Step 6: Document confirmation
Once uploaded, you will be directed back to your list of loads. A confirmation message will appear on the right letting you know your documents have been uploaded successfully and been added to the load. It may take a moment for the document to show up in the load details panel. You can continue to upload additional documents if you’d like.

Mobile – Owner-Operator or Dispatcher
Step 1: Open the app
Launch the Navisphere Carrier app on your smartphone.
Step 2: Go to your load
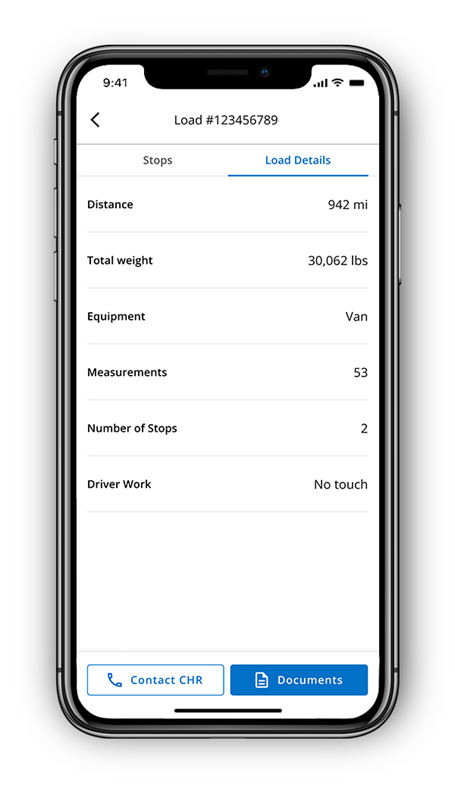
Tap the My Loads tab and find the load you want to upload documents for. Once found, tap Load Details.

Step 3: Add documents
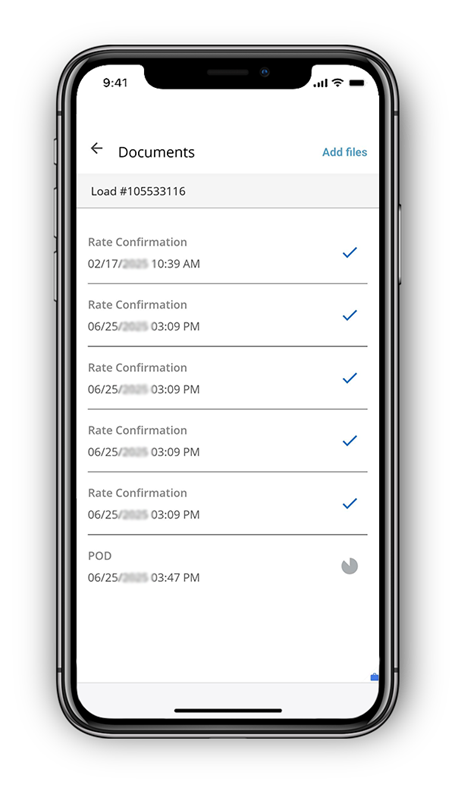
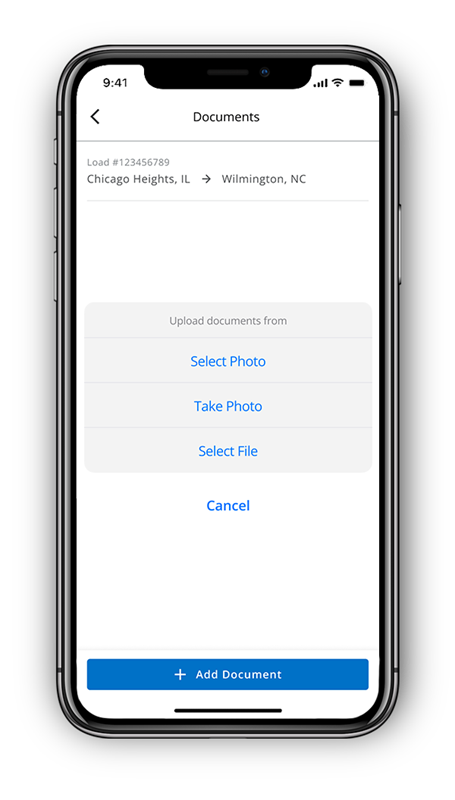
Tap the Documents button, then tap the Add files button. You can either select a photo, take a photo, or select a file.

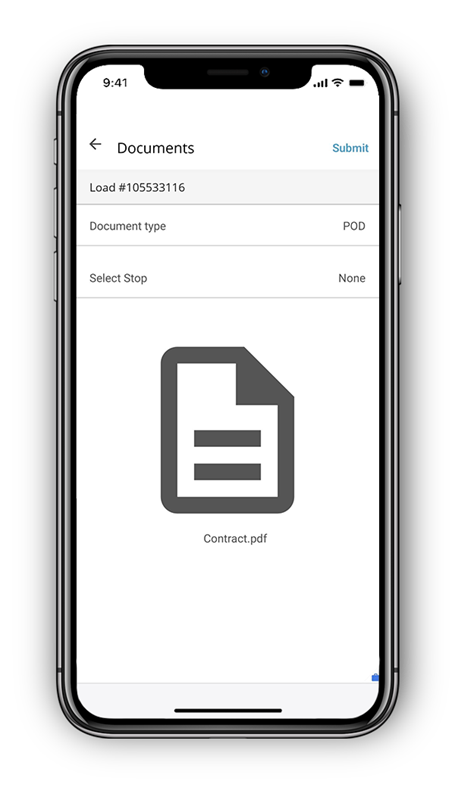
Step 4: Confirm document type
Once the document is selected from your device, add the document type. You also have the option of adding the document to a stop. If it does not apply to a stop, select none.
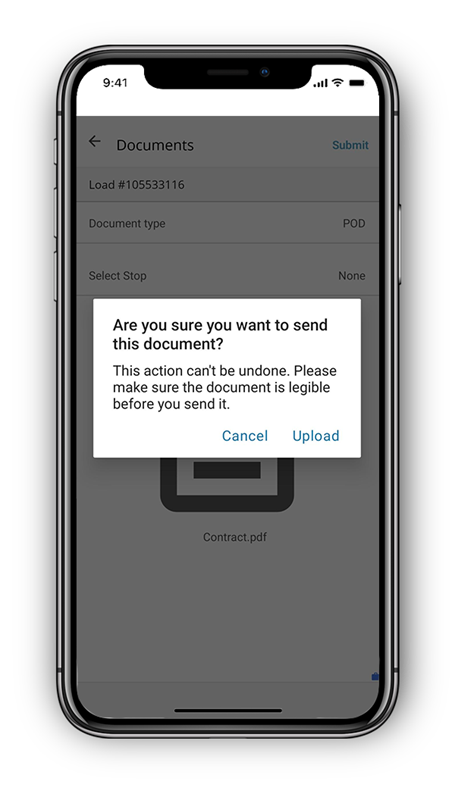
Step 5: Upload document
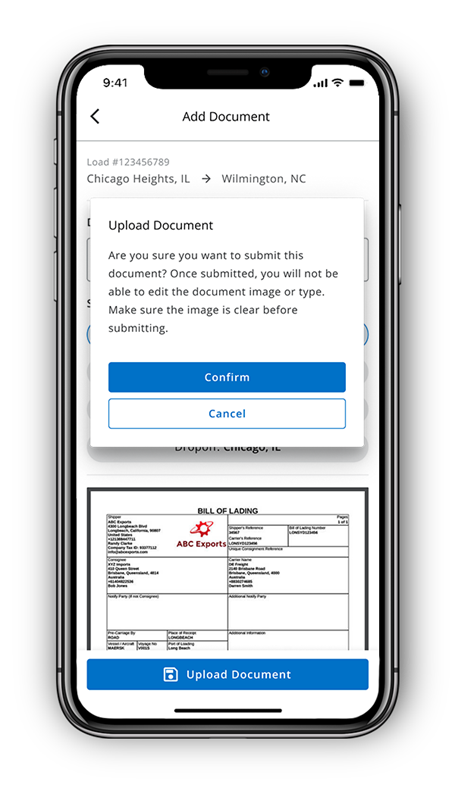
Tap Upload Document. You’ll be prompted to confirm your upload, as you will not be able to edit it later.
Step 6: Document confirmation
Once confirmed, you will be directed to another screen that shows your document has been uploaded successfully and added to the load. You can continue to upload additional documents or return to the load details by tapping the back arrow at the top left of your screen.
Mobile – Driver
Step 1: Open the app
Launch the Navisphere Carrier app on your smartphone.
Step 2: Go to your load
Tap the My Loads tab and find the load you want to upload documents for. Once found, tap Load Details on the top right.
Step 3: Add documents
Tap the Documents button, then tap the Add Documents button. You can either select a photo, take a photo, or select a file.
Step 4: Confirm document type
Once the document is selected from your device, add the document type. You also have the option of adding the document to a stop. If it does not apply to a stop, select none.

Step 5: Upload document
Tap Upload Document. You’ll be prompted to confirm your upload, as you will not be able to edit it later.
Step 6: Document confirmation
Once confirmed, you will be directed to another screen that shows your document has been uploaded successfully and added to the load. You can continue to upload additional documents or return to the load details by tapping the back arrow at the top left of your screen.

Tips for faster payment
- Upload immediately: Don’t wait—upload documents as soon as the delivery is complete.
- Use clear images: Make sure photos of documents are legible and well-lit.
- Stay notified: Enable notifications to get updates on payment status.
- Label correctly: Select the right document type to avoid processing delays.
- Web
- Mobile – Owner-Operator or Dispatcher
- Mobile – Driver
- Tips