-

-

-

-

-
CopyToClipboard
- Find your load
- Load details
- Request detention
- Choose the right stop
- Enter times
- Select supporting docs
- Final check
- What happens next
Step-by-Step: How to Submit Your Request
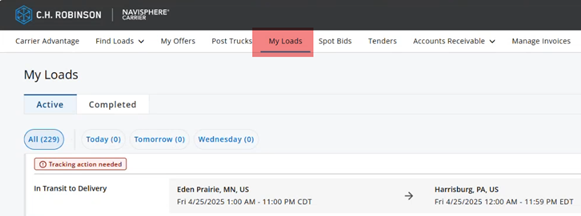
1. Find YOUR Load
- Log into the Navisphere Carrier website.
- Go to the My Loads menu item at the top.
- Locate the load you want to request detention for.
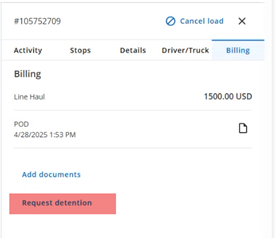
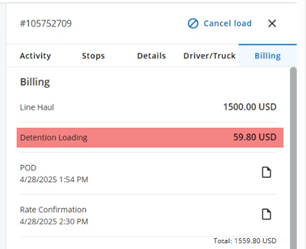
2. Go into the Load Details
- Click on the load.
- Navigate to the Billing tab inside that load.
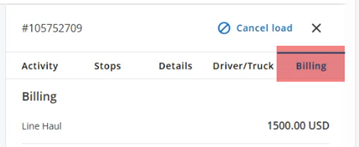
3. Request Detention
- Click the Request Detention link.
4. Choose the Right Stop
- Select the stop you’re requesting detention for.
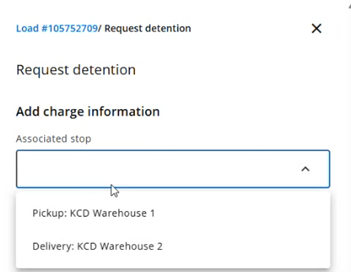
Note: If you already requested detention for that stop, you'll get an error message and won't be able to submit again.
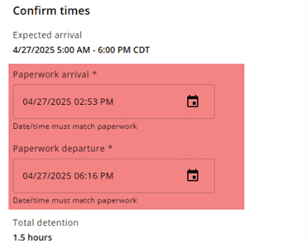
5. Enter the Times Carefully
The system requires you to enter the arrival and departure times that appear in the paperwork.
If the times on the screen don't match what's on the paperwork, it will not pass validation.
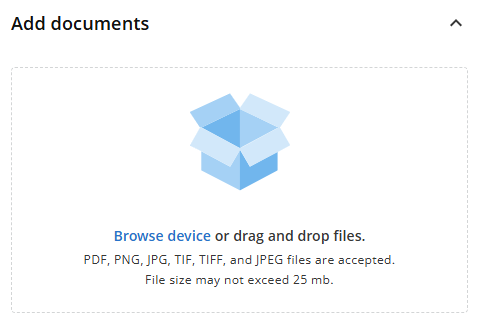
6. Select Your Supporting Documents
You'll now be asked to select the document that proves the times you’re requesting detention for.
- Any documents already uploaded to the shipment will show up.
- If the right document isn’t available:
- Upload the correct document using the Add Documents modal on the screen.
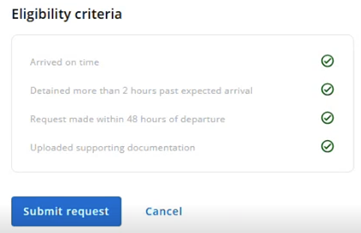
7. Final Check: Eligibility Review
Once you've selected your document, the system will verify if you meet the four eligibility rules.
- If you meet all the criteria, the Submit Request button will become active.
- If you miss anything, the button will stay grayed out and you won't be able to submit.
8. What Happens After You Submit?
Once you've selected your document, the system will verify that this is a valid detention request.
Our system uses AI to validate your request by:
- Looking for the times you entered in Navisphere Carrier and matching them to the paperwork.
- Comparing those times to actual known shipment times.
If everything matches:
- You'll see the detention money added to your shipment.
- Note: It may take a few minutes for money to show up on the shipment.
If something doesn't match:
- Your request goes into an Exception Queue.
- Your capacity rep will manually review and either approve or reject it.
- Find your load
- Load details
- Request detention
- Choose the right stop
- Enter times
- Select supporting docs
- Final check
- What happens next